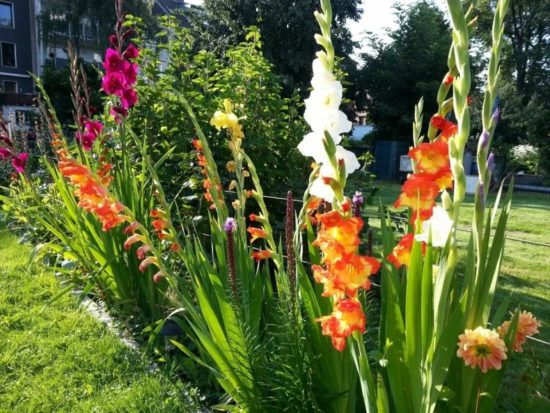
Gladioli are many favorite ornamental crops, the cultivation of which requires a lot of effort and hard work. To obtain lush and abundant flowering, you need to study the detailed information provided in this article on preparing the bulbs for planting.
|
In order for gladioli to always be healthy and bloom luxuriantly, it is necessary to change the planting location at least once every two or three years, and it is better to do this every year. |
We begin preparing gladioli bulbs for planting
It is important to take into account every nuance - the timing of the start of preparatory procedures, sorting and processing of planting material, germination rules and features of planting children. If you take each stage of the work responsibly, especially since even an inexperienced gardener can do it, then in the end you will definitely get a beautiful and fragrant flowerbed with gladioli.
When to plant bulbs in the ground
The climatic features of different regions do not allow us to name an exact and uniform date for everyone at once. But a prerequisite for choosing a planting day in any area is soil heated to eight to ten degrees Celsius at a depth of about ten to fifteen centimeters. It is very important to calculate the planting date so that seedlings appear already at a stable air temperature ranging from twenty-two to twenty-five degrees. With such indicators, young plants will quickly grow.
Attention! Too early and too late dates are equally dangerous for planting bulbs. If you plant tubers in cold soil with high humidity, they will die from the development of rot.In well-warmed and dry soil, the growth and development of bulbs is suspended due to lack of moisture, which will lead to a delay in flowering.
The optimal period for spring planting is from mid-April to early June. Recommendations by region:
- Northern Caucasus, Krasnodar Territory and other southern regions - the second or third ten days of April.
- South of the Volga region - mid-April.
- Moscow region - first half of May.
- Ural, Siberia, Leningrad region - late May or early June.
When to start preparing bulbs for planting
Preparing the bulbs for planting should begin approximately fifteen to twenty-five days before the selected date. These figures do not depend on where the planting material was stored - in the basement, in the refrigerator, on the balcony, on the windowsill or in another cool place.
|
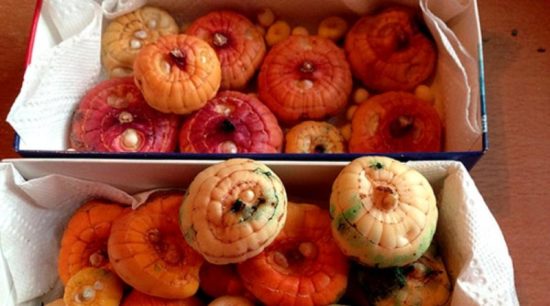
Two to three weeks before planting, the bulbs are removed from winter storage |
Bulb sizing
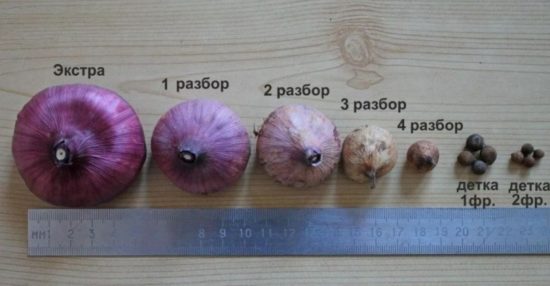
The quality and timing of gladioli flowering directly depend on the size of the bulb and the depth of its planting. For this purpose, the material is sorted not only by external quality indicators, but also by the diameter of the tuber or child. It is customary to divide all planting material according to the following parameters (in diameter):
- from 8 to 14 millimeters;
- from 15 to 24 millimeters;
- from 25 to 31 millimeters;
- from 32 millimeters and more;
- children less than 5 millimeters;
- children are more than 5 millimeters.
|
Sorting bulbs before planting |
After calibration, it is much more convenient to plant without selecting the required depth for each tuber. For example, large specimens go deeper and bloom much earlier than medium and small ones.
Do not miss:
Peeling
Cleaning the scales promotes germination of the bulbs and speeds it up by about four to five days. Peeling of dead, modified leaves is recommended to be done carefully so as not to accidentally damage the emerging shoots. The scales are removed from the middle of the bulb, from the beginning of the sprout (or from the place where the stem was cut last year). It is necessary to carefully take the husk by the edge and remove it slowly, without sudden movements.
|
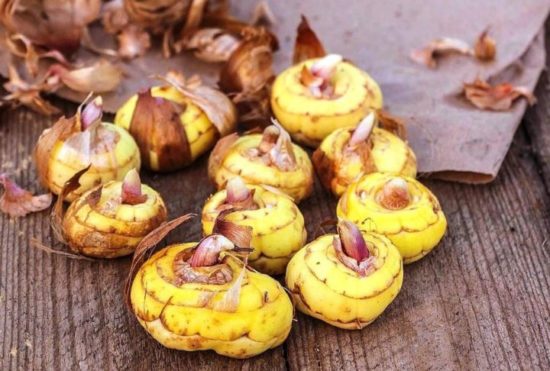
Bulbs need to be peeled before planting in the spring. If you clean them in the fall, they may not survive the winter. |
Important! Pests often remain under dry scales for the winter. It is necessary to promptly rid the bulbs of the husks before thrips and various harmful microorganisms become active.
Treatment against diseases and pests
- For diseases of various origins (bacterial, viral, fungal), special and proven means can be used for treatment.
- “Fundazol” - planting material is soaked in a solution of one liter of water and five grams of powder for two to two and a half hours.
- “Maxim” - disinfection in the finished solution lasts from one to two hours.
- Bordeaux mixture (1% solution) is the best remedy against fungal diseases. Processing time is about two hours.
- Copper oxychloride is an effective means for the prevention and control of scab, rust and late blight. The corms are left in the solution for three to four hours.
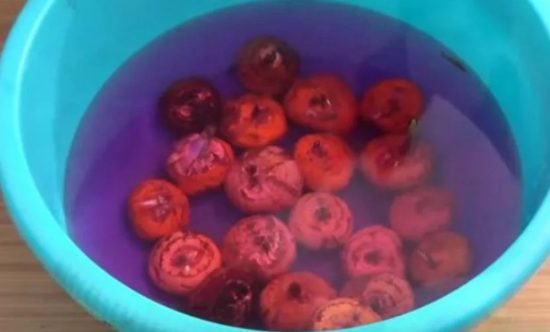
- A solution of potassium permanganate (2%) is the most common remedy against pathogenic bacteria and harmful microorganisms. Treatment in a solution of two liters of water and four grams of the substance lasts from thirty to forty minutes.
|
Keep gladioli bulbs in any of these solutions for the time strictly specified in the instructions. Bulbs overexposed to solution may then develop solid rot, which will be difficult to cure. |
- For pests (aphids, spider mites, weevils, sawflies, moths, moths, thrips and others), popular and effective drugs purchased in specialized retail chains or prepared at home are recommended. Among them are “Aktara”, “Aktellik”, “Karbofos”, “Dichlorvos”, “Malathion”, “Confidor”, infusion of garlic or ash. Treatment time in disinfecting solutions is about thirty minutes. To spray with Dichlorvos, planting material is placed in a plastic bag, the product is sprayed and the bag is tightly tied for half an hour. You can dust the tubers with powdered Karbofos. Garlic infusion is prepared from five liters of water at room temperature and 150 grams of garlic pulp. Soaking in the infusion lasts about two hours. An ash infusion made from a liter of water and two tablespoons of ash not only stimulates growth, but also destroys pests.
Treatment with growth stimulants
To stimulate the growth of tubers and the formation of strong roots, it is necessary to feed them and saturate them with useful minerals and trace elements. It is recommended to prepare nutritional mixtures and solutions in plastic or enamel containers. Ready-made complex preparations are used strictly according to the instructions on the packaging. “Mikromix”, “Tsitovit”, “Kornevin”, “Epin”, “Kornerost”, “Zircon” are considered popular among gardeners.
Reference! You can combine treatment with stimulating and disinfecting solutions.
Options for growth stimulants for treating gladioli bulbs and duration of treatment:
- two liters of water and ten grams of copper sulfate – eight hours;
- five liters of water and two and a half milliliters of Epin - five hours;
- sodium humate (0.2% solution) – two hours;
- boric acid solution (0.2%) – two days.
Don't forget to read:
Interesting video about preparing gladioli for planting:
How to properly sprout bulbs
There are several ways to germinate planting material. Each of them has its own characteristics.
-
On a flat plate
Healthy and peeled tubers are placed sprouts up on a plate and placed in a bright room with a temperature of about twenty-five degrees. If the sprouts begin to grow too quickly due to bright lighting, then it is worth moving them to a darker room.
|
To speed up germination, pour a small amount of purified or settled water onto the bottom of the plate, but only the bare minimum. Excess moisture can lead to the development of rot. |
-
On fabric or paper
If there is still a lot of time before the chosen planting date, then you can use this germination method. Planting material must be placed in a large cardboard box with low sides, the bottom of which is covered with natural fabric or dry thin paper. The bulbs are placed in one layer with a small interval between adjacent specimens. It is important to place the box in a warm room, but away from heating appliances.
-
On wet sawdust
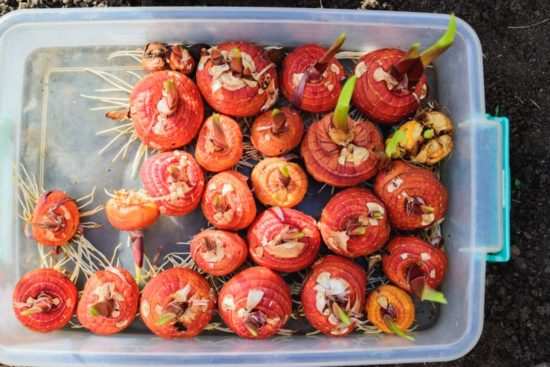
This method is suitable for those who need quick germination. Fine sawdust is poured with boiling water twice, cooled, squeezed out and covered with the bottom of a suitable container. The bulbs are laid out on wet sawdust, bottom down.
On a note! It is not necessary to germinate early and mid-early varieties. In regions with harsh climates and short summers, germination, on the contrary, is simply necessary. Bulbs that have sprouted in several places at once must be cut into several parts (so that each has its own sprout), the cut areas must be treated with disinfectants, and they can be planted like ordinary tubers.
What to do with damaged bulbs
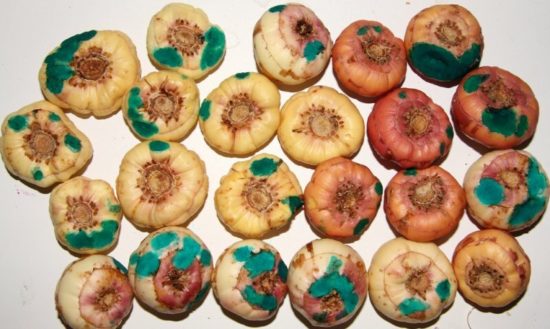
Bulbs with a large area of rotting, darkened bottoms, as well as completely dry specimens are recommended to be discarded immediately. Minor damage on the surface can be dealt with if the bottom remains clean and there are rudiments of roots.
- If there are small eyes - spots - they are cut out (as on potatoes) using a knife disinfected in alcohol, and then treated with ash, activated carbon (in powder form) or brilliant green. It is recommended to carry out this procedure at least two weeks before planting, so that the “wounds” have time to dry out and heal.
- Dark spots that have not penetrated to a greater depth are cut off from the surface and treated in a similar way. To form a protective coating (film) after removing the stain, the bulbs need to be slightly air-dried.
|
Damaged areas are cut out with a knife and treated with brilliant green |
Attention! Damaged specimens, even after rescue measures, are recommended to be planted separately from healthy tubers and only in soil pre-treated with fungicides.
What to do if the bulbs germinate ahead of time
If storage conditions, namely temperature and humidity, are violated, the bulbs begin to germinate in January - February.If germination is noticed at the initial stage, such tubers are transferred from the refrigerator or cellar (where they were stored) to a dry and warm place and left for a couple of weeks to dry.
Dried specimens are placed in conditions with a temperature of about five to six degrees Celsius and a humidity below seventy percent. About fifteen days before landing, their conditions of detention are changed again. The temperature should be from thirteen to fifteen degrees Celsius.
|
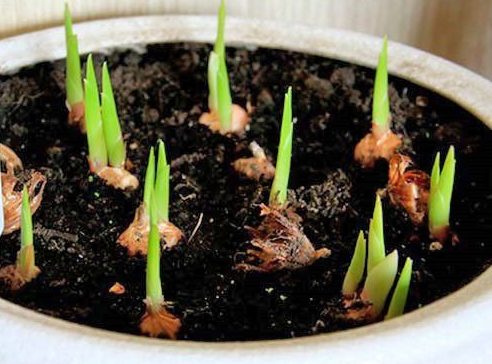
If the sprout is already quite long, but there are no new roots yet, such bulbs are planted in a small flower pot and kept indoors, providing the plant with the necessary amount of light and moisture. In spring, gladioli are transferred to an open-air flower garden. |
What to do with children in spring
Around the middle or end of April (depending on the local climate), it is necessary to sort the babies by size, get rid of the affected specimens and then place them on dry paper in a room with moderate humidity and a temperature of no more than ten degrees.
|
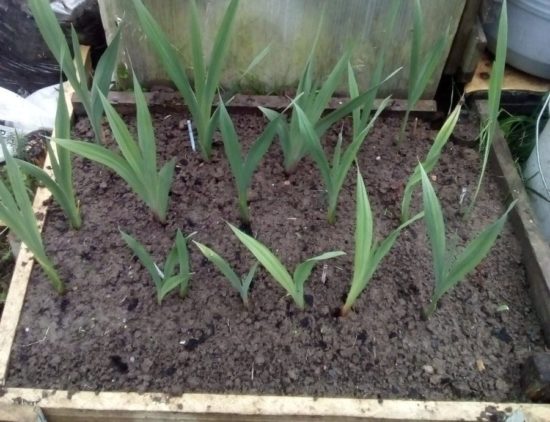
Two weeks later, the day before planting, the children are cleaned of dry scales, disinfected and planted in flower beds to a depth of three to five centimeters. The distance between plantings is about five centimeters, the row spacing is up to fifteen centimeters. |
You can germinate the baby in a peat pot or plastic cup with a nutritious light substrate until seedlings are obtained. The planting material is buried two to three centimeters, covered with film and left in a cool place at a temperature of about ten degrees. When sprouts appear, longer lighting will be required, which can be organized using fluorescent lamps.The daylight hours of flower crops should be at least twelve hours. The grown seedlings are transferred to an open flower garden as soon as weather conditions allow.
Don't forget to read:
The best varieties of gladioli of Russian and Dutch selection ⇒
How to grow gladioli from children:
Planting bulbs in the ground in spring
Bulbs can be planted in holes or trenches. The planting depth is calculated by multiplying the diameter of the tuber (in cm) by three. For example, the diameter of a tuber is three and a half centimeters multiplied by three, we get ten and a half centimeters.
|
When planting, in addition to sand, it is good to add a handful of wood ash. Ash will help protect the bulbs from rot. |
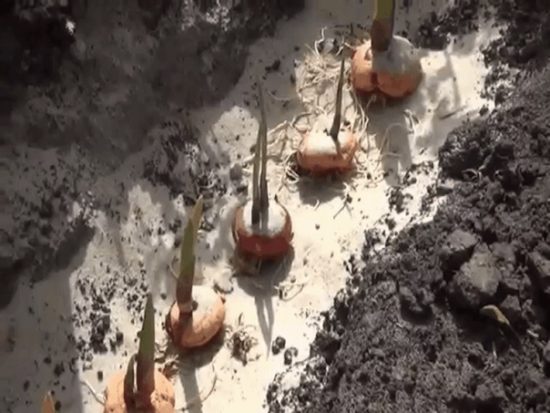
A two-centimeter layer of sand is poured onto the bottom of the planting hole or trench, watered, then the bulbs are placed at intervals of about twenty centimeters, then another layer of sand and, at the end of the process, the prepared soil. Gladioli are mulched with peat or humus.
Competent, according to all the rules, preparation of gladioli bulbs for spring planting means the fragrance, brightness, beauty and attractiveness of flower crops. To prolong flowering, tubers are planted in spring in several stages with an interval of one and a half to two weeks.
You might be interested: |

 CUCUMBERS NEVER GET SICK, I'VE BEEN USING ONLY THIS FOR 40 YEARS! I SHARE A SECRET WITH YOU, CUCUMBERS ARE LIKE THE PICTURE!
 You can dig a bucket of potatoes from each bush. Do you think these are fairy tales? Watch the video
 How our fellow gardeners work in Korea. There is a lot to learn and just fun to watch.
 Eye trainer. The author claims that with daily viewing, vision is restored. They don't charge money for views.
 A 3-ingredient cake recipe in 30 minutes is better than Napoleon. Simple and very tasty.
 Therapeutic exercises for cervical osteochondrosis. A complete set of exercises.
 Which indoor plants match your zodiac sign?
 What about them? Excursion to German dachas.