The summer flowering of gladioli, or rather its quality, directly depends on the correct harvesting of the bulbs in the fall and their proper storage in the winter.At what time and in what way should bulbs be dug up? How to properly prepare them for storage? In what conditions should planting material be kept in winter? Answers to these and other questions regarding the preservation of plants in the cold months can be found in this article.
| Content:
|
|
Bulbs should be sent for storage well dried. |
When and how to dig up gladioli in the fall
It is strictly not recommended for gladioli to winter in open ground, since low temperatures and high humidity contribute to the development of diseases and the appearance of pests. In such conditions, the root part most often does not survive.
|
With the arrival of autumn, it is necessary to take care of preparing plants for a difficult period for them and you need to start by choosing a favorable date for digging the bulbs out of the soil. |
For this important procedure, you should choose a warm, dry day with an average air temperature of five to ten degrees. The soil in the flower garden should be dry. It is very important that three weeks to one and a half months pass after the end of flowering of gladioli. A more precise date will depend on the plant variety and climatic conditions of the area. For example:
- in southern climates - until the twentieth of October and later;
- in the middle zone, in Moscow and the Moscow region - during September;
- in the northern regions - at the end of August or early September.
Reference! In regions with warm winters, for example in the Crimea and the Krasnodar Territory, crops are covered with mulching material, film, spruce spruce branches or agrospan and left to overwinter in open ground.
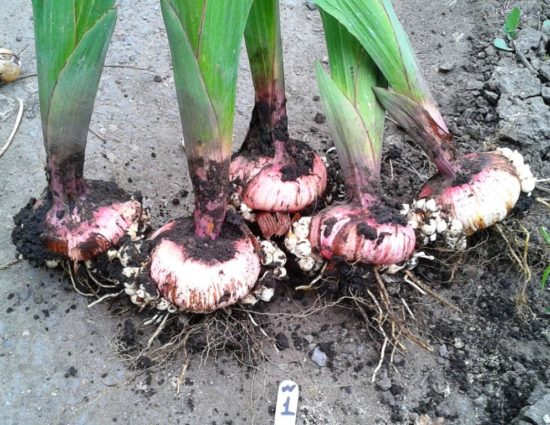
To remove the bulbs from the ground, you will need a pitchfork or shovel, as well as a film or a piece of thick fabric. At a distance of fifteen to twenty centimeters from the bush, the shovel is inserted into the ground at full bayonet level, the earthen lump is carefully lifted and placed on a cloth or film. Further work with the bulbs and “babies” is carried out in several stages - cleaning from soil, sorting, disinfection, drying and storage.
Preparing gladioli bulbs for winter storage
Trimming
Plants removed from the soil are shaken off the ground and the above-ground part is cut off using disinfected scissors or pruners so that a small stump two to three centimeters high remains on the corm. After this, all planting material (bulbs and “babies”) are thoroughly washed in a container with warm water. The old drying bottom at the root part is carefully broken off. In unripe specimens, it does not separate easily, so it is necessary to give the tubers time to ripen and dry slightly. Next, they move on to sorting all the material.
Sorting
The main tubers and children are sorted by size, variety and health status. All specimens damaged by pests and diseases must be removed or isolated from healthy seed material. Tubers with minimal damage can be trimmed, and the cut areas can be treated with brilliant green, strong potassium permanganate or activated carbon powder.Sorting can be carried out before or after disinfection measures.
Treatment
For convenience in the future (during planting), each variety must be processed separately. After processing, the entire assortment is laid out according to diameter size.
|
Treatment of bulbs after digging with potassium permanganate |
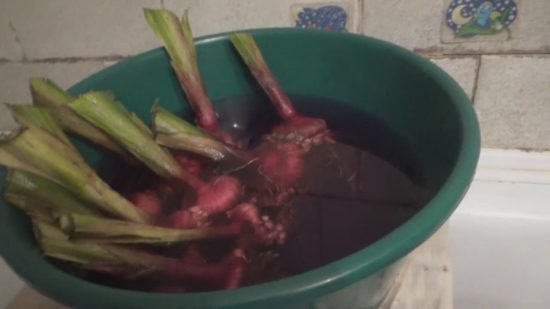
Clean and dry bulbs must be kept for an hour in a container with a weak solution of potassium permanganate (pink), and then in a special disinfectant solution for a certain time. There are several options:
- Karbofos (10 grams per two and a half liters of water) – 15 minutes;
- Fundazol (1%) – about 40 minutes;
- Fitoverm – 30 minutes;
- Intra - Vira - 30 minutes;
- Fitosporin – one or two hours;
- Trichoderm (a teaspoon per two liters of water) – 30 minutes;
- Hot water (about fifty degrees) – five minutes.
Important! It is recommended to treat corms with insecticides against pests, and with fungicides against signs of diseases. It is enough to soak absolutely healthy planting material in a pink solution of potassium permanganate or a one percent solution of boric acid.
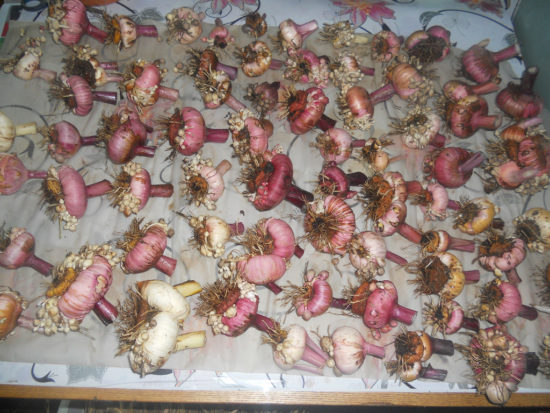
After all water-based treatments, it is recommended to dry the tubers and children.
Drying
The bulbs, dried after disinfection in various solutions, are left for a short period in the open sun. For three to four days they are outside from morning to evening, and at night the planting material is brought into a warm, dry room.
The next stage is drying at a temperature of 23–26 degrees for two or even three weeks, and the final stage at a temperature of 18–22 degrees for about another twenty days.
|
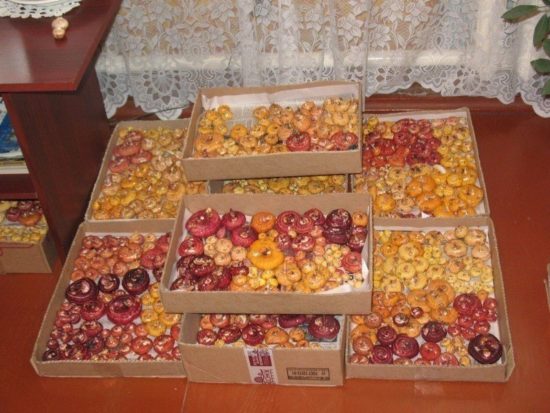
After going through all the stages of drying, the sorted material is sent for long-term storage until spring. |
For complete drying, you will need containers with holes for ventilation made of different materials - thick cardboard, wood, plastic. It is recommended to periodically turn the bulbs over and carefully inspect them for rotting or the appearance of any disease. At the slightest sign of the onset of the disease, the damaged specimen is removed from the common box.
Attention! To dry, the bulbs must be placed in boxes in only one layer, loosely against each other.
Under what conditions should bulbs and “babies” of gladioli be stored until spring?
For the safety of gladioli in winter, the following factors are very important - suitable air humidity, strict adherence to temperature conditions and good ventilation in the room. If during the next inspection softened corms were detected, it means that the storage conditions were not met. The planting material was either “frozen,” or “overheated and cooked,” or it was affected by rot due to excess moisture and lack of fresh air.
On a note! In the first fifty to sixty days, the bulbs can retain their qualities in almost any conditions, and after this period irreversible processes can begin (for example, the appearance of sprouts).
Ideal conditions for storing babies and bulbs at home:
- indoor air temperature - from two to five degrees Celsius;
- optimal air humidity is from sixty to seventy percent;
- the presence of high-quality ventilation or regular ventilation.
Important! In conditions of high humidity, rot develops on the tubers, and in a room with dry air they can dry out completely.If the bulbs dry out slightly, before planting in the spring, wrap them in a wet cloth for a day.
Watch a video about storing gladioli at home:
How to store bulbs in an apartment until spring
In an apartment or house, you need to find places for storage where the air temperature is maintained at five to ten degrees.
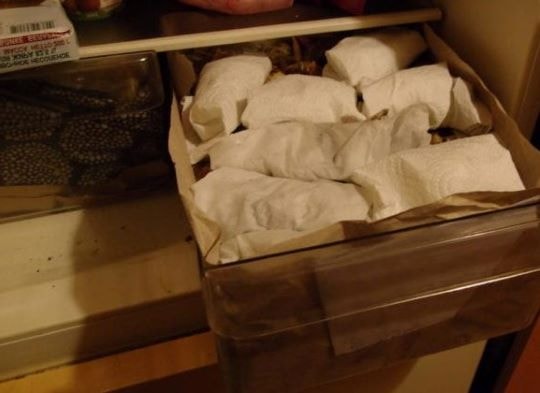
The best option is a refrigerator, or more precisely, a bottom shelf or a special compartment for vegetables. There the bulbs are easiest to preserve until spring arrives. Planting material is placed in small bags made of natural fabric or in bags with ventilation holes, and they are labeled for convenience. It’s even better if you first wrap each tuber in newsprint. The paper will have to be replaced once a month, as it becomes damp in humid conditions.
|
The negative aspect of this method is that there is not enough space in the refrigerator if there is too much seed material. |
Containers with tubers can be placed on the floor near the balcony door or on the windowsill. In this case, heating devices should not be close to the containers. The bottom of a cardboard box or low wooden box is covered with paper, the bulbs are placed so that they do not touch each other. You can sprinkle them with calcined dry sand.
For one to two months, planting tubers can be stored in a regular pantry, if it is a little cooler than in the entire apartment. If the temperature in it is more than eighteen degrees, then such a place is not suitable.
At home, you can consider another storage option such as a space between a double entrance door or a vestibule. A significant drawback is that this is a walk-through place.
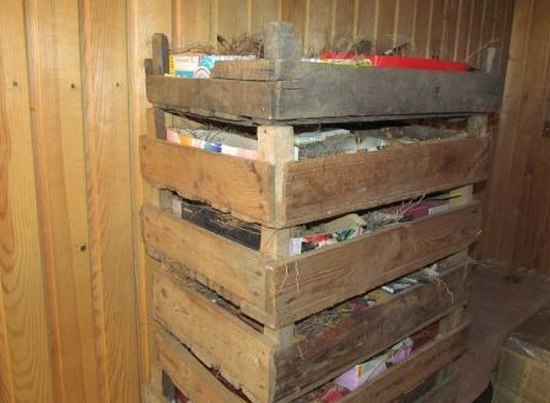
Storing gladioli bulbs in the cellar
The correct containers for storing bulbs in a basement or cellar would be small wooden boxes, linen bags, nets or old stockings, and if the humidity is below normal - glass jars (they are filled only 50 percent).
|
Bad neighbors for tubers in the basement will be carrots, potatoes, beets, quinces, and apples. It is recommended to place them as far as possible from each other. |
Attention! Do not forget about the possible presence of rodents in the basement, for which tubers are also food.
Attic storage
The attic is very cold and often frosty in winter. Only if there is stove heating, the space near the chimney always remains suitable for storage and can be used to place boxes with planting material. Each onion must be packed in a sheet of paper or a piece of newspaper, and then laid out in one layer in a suitable container.
Storing gladioli in a trench
Since in the harsh northern regions the ground can freeze to great depths, this method is not recommended for use there. It is more suitable for southern and temperate latitudes and only for areas with deep groundwater and preferably at a low elevation.
Planting material is placed in prepared containers with ventilation holes or a lattice bottom, sprinkled with peat, sand or dry sawdust. To lay a box, dig a trench with a depth of seventy to one hundred centimeters, install it, sprinkle it with a large amount of fallen leaves, straw or sawdust (in the form of a mound), then cover it with a transparent film.
Don't forget to read:
The best varieties of gladioli of Russian and Dutch selection ⇒
On the loggia
The ideal storage location is a loggia or glassed-in balcony. It is best to use a polystyrene box as a container. You can take any cardboard or wooden container and line its walls and bottom with foam plastic.
|
What is the advantage of this method is the ability to control the temperature and condition of the bulbs at any convenient time. If necessary, the box can be insulated or opened for ventilation. |

Waxing of bulbs
For long-term storage and effective protection against fungal diseases, the bulbs are covered with a layer of paraffin. To do this, melt the paraffin in a water bath, lower the tubers there one by one, and then dip them in cold water to harden the protective layer. Before planting, the paraffin coating will have to be washed off or cleaned. The method is of course labor-intensive, but the bulbs are preserved well in paraffin.
What problems may arise when storing gladioli?
- The surface of the bulbs began to become covered with mold - this indicates increased air humidity. It is necessary to transfer the gladioli to a warm room and dry them for two to three days at a temperature of about twenty to twenty-two degrees. Before returning the bulbs to their original storage location, it is recommended to normalize the humidity level.
- The bulbs began to sprout - this is a signal of an increase in air temperature. They urgently need to be moved to cooler conditions with low humidity and a temperature of about one degree Celsius. When the growth process slows down, the gladioli are returned to a favorable place.
- The tubers began to dry out greatly - this indicates their immaturity. It is recommended to store bulbs that have not yet ripened under a protective paraffin layer.
- The planting material becomes soft - you need to move them to a room with a higher temperature. The softness of the tuber occurs when it is subject to prolonged hypothermia.
Following simple rules for digging, processing and storing gladioli corms in the fall is the key to long, bright and lush flowering in the next warm season.

 CUCUMBERS NEVER GET SICK, I'VE BEEN USING ONLY THIS FOR 40 YEARS! I SHARE A SECRET WITH YOU, CUCUMBERS ARE LIKE THE PICTURE!
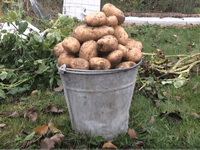 You can dig a bucket of potatoes from each bush. Do you think these are fairy tales? Watch the video
 How our fellow gardeners work in Korea. There is a lot to learn and just fun to watch.
 Eye trainer. The author claims that with daily viewing, vision is restored. They don't charge money for views.
 A 3-ingredient cake recipe in 30 minutes is better than Napoleon. Simple and very tasty.
 Therapeutic exercises for cervical osteochondrosis.A complete set of exercises.
 Which indoor plants match your zodiac sign?
 What about them? Excursion to German dachas.