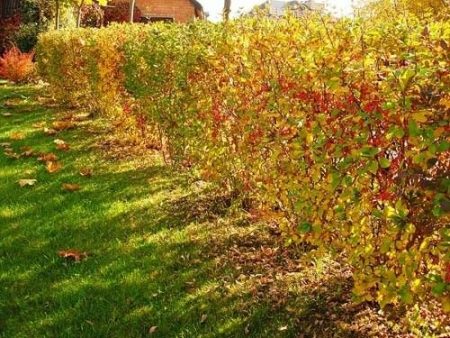
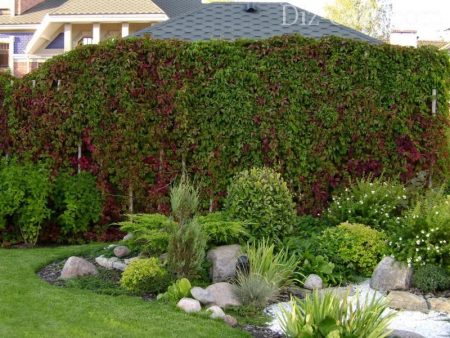
Any fence is a kind of curtain that allows a person to isolate himself and isolate the space that belongs to him from the external environment. But man is a part of nature. If his gaze constantly stumbles upon a monotonous wall (any one - brick, stone, metal), he will feel psychological discomfort.The closed “shoebox” of such fences isolates a person from the outside world. You can’t just separate yourself from nature without disturbing the balance with it.
A fence made of plants is an ideal solution when choosing a fence, because it is both a wall and a piece of nature at the same time. In addition, a garden with a living frame always benefits from an environmental and decorative point of view. So what is the best material to make a hedge from?
Planting a hedge with your own hands is within the capabilities of many gardeners and will bring double pleasure: because it is your own creative work and because no one else will have the same one.
How to make a hedge from climbing plants
A hedge can be made from climbing plants, you just need to decide on the specific task that the hedge on the site should cope with. Inside the personal territory, it is more appropriate not to dense monolithic barriers, but to openwork light partitions. There is an alternative to hedges made of trees and shrubs - climbing herbaceous plants on a frame. More precisely, they are a private version of a hedge.
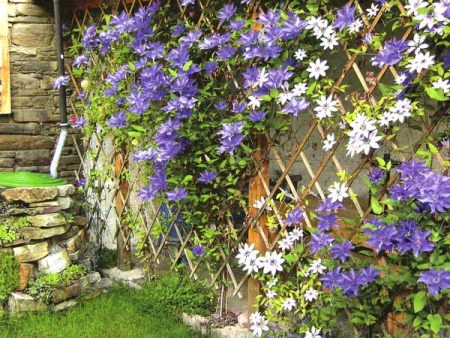
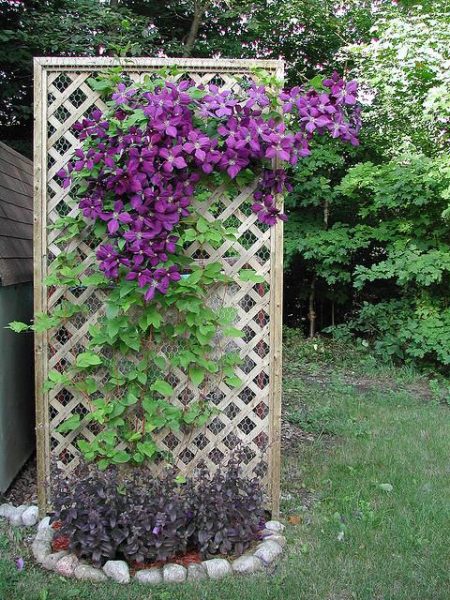
Trellis with clematis as a hedge.
Trellis and trellises are decorative garden elements with history. In Europe they are in great demand, but in domestic gardening until recently they were slightly forgotten. Meanwhile, such living screens are both decorative and functional. Trellis, trellises, lattice panels with climbing plants can be used to fence off individual areas of the garden to create secluded corners and visually structure the space.
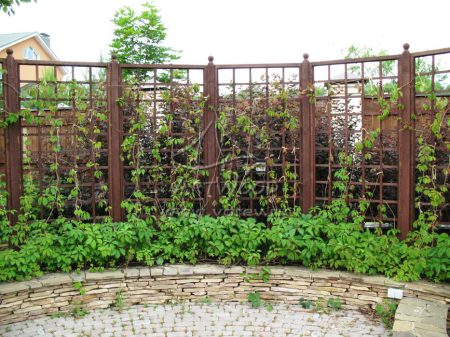
A hedge can be made from decorative latticeworks like these.
These kind of screens provide the desired shade, cover from drafts, and mask places that are not desirable for viewing. Such “flat” flower beds are pleasing to the eye, decorate the garden with greenery and bright colors, without taking up much space. Thus, a broken line of lattice “blooming” panels can be an accent in the garden, hiding an unattractive area or outbuildings from view. At the same time, it is easy to pass through such a fence to the opposite side of the garden.
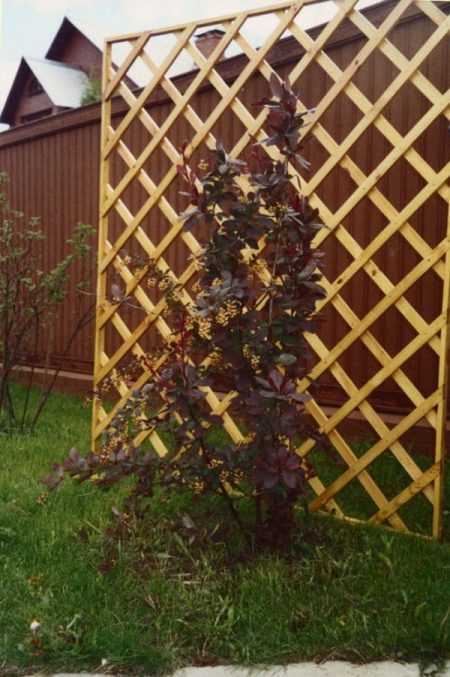
The purpose of the trellis can be twofold: a beautiful wooden or forged trellis can be the foreground, the “proscenium” of the composition, and a light “green” garland on it can be an emphasizing and shading addition.
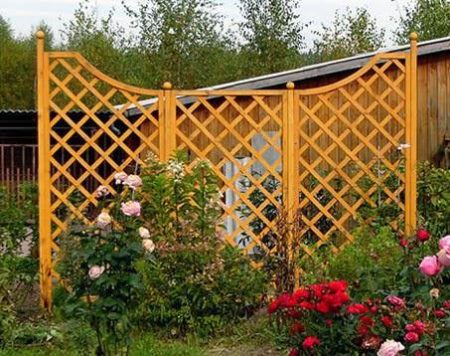
Trellis in the garden.
In another embodiment, the support can act as an inconspicuous frame for vines and vines.
Attention! Living walls from herbaceous plants can be “built” much faster than growing them from shrubs - and in this they are simply a godsend for those gardeners who do not want or do not have the opportunity to wait long.
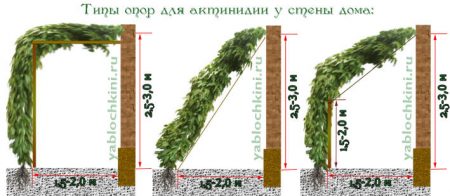
The bonus is that the support structure can be installed, in addition to the vertical position, in inclined and even horizontal planes.
Plants for different options are selected accordingly. So, the girl’s grapes will quickly cover with a dense carpet the entire surface provided to it from bottom to top. And honeysuckle honeysuckle or clematis will spread only on the upper part of the support, without covering the lower one.
Not all climbing plants are able to climb to the top of the trellis and entwine their entire frame. Therefore, to create high green walls, we can recommend vigorous vines:
- grapes – maiden five-leaved, maiden trizacuminate, fragrant, Amur;
- aristolochia macrofolia,
- ivy.
When decorating low fences, low-growing vines are used:
- honeysuckle – honeysuckle, evergreen, Thälmann;
- clematis - all types and varieties,
- Schisandra chinensis,
- actinidia.
The perennial vines listed above can be combined with annual ones - decorative beans, sweet peas, Japanese hops.
A wooden support for climbing plants is easy to make with your own hands, but will require cosmetic repairs and maintenance treatment with an antiseptic before installation and every two to three years after it. This is especially true for places in contact with the ground.
A budget option is the commercially available plastic mesh with different cell sizes. At first they do not require maintenance, but then they quickly become unusable. In addition, they are monotonous and do not always fit into the style of the garden.
Professionals do not recommend building perforated support walls for vines made of brick or special stone yourself, since the safety of such a structure requires sufficient skill.
To achieve the greatest effect when decorating with climbing plants, you should adhere to a number of requirements:
- one species should be given a solo role, the rest should “subordinate” and complement it;
- the plants participating in the composition must be somewhat similar in external characteristics, in harmony with each other (for example, in the texture of the leaves, in the shape of the flower or its color, etc.);
- do not overdo it with the number of species in the composition. Two or three types of plants are already quite enough. The following pairs can be cited as an example of a successful air-ground partnership:
- common ivy and purple foxglove,
- Clematis Jacquemand Purple Rain and Royal Yellow Lily,
— maiden vine and paniculata hydrangea.
In addition, an interesting idea is the possibility of creating a portable “screen” from individual fragments anywhere in the garden.
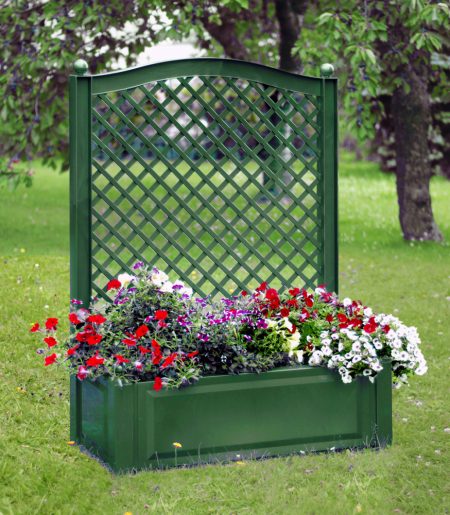
They are modules consisting of wooden or plastic boxes with a nutrient substrate and a lattice panel installed in the middle, entwined with a one- or perennial vine.

Such portable modules are perfect for making hedges.
We can recommend absolutely affordable landscaping options for such a mobile “curtain”. For a vertical background, you can plant spectacular fast-growing herbaceous plants to choose from:
- Echinocystis (a spectacular weed, often popularly called mad cucumber),
- nasturtium (less known name - capuchin),
- chinu (so-called sweet pea).
At the foot of such a “curtain”, petunias and surfinias (a group of ampelous, i.e. hanging, petunias) will look good, which must not be forgotten to match the color scheme with the “top”.
Choosing planting material for hedges
The wide selection of plant species and their varieties for hedges presented on today’s “green” market can satisfy any most demanding taste. Planting material for a hedge needs to be uniform and in large quantities, so it is better to purchase it from a local nursery. There, seedlings are grown from varieties adapted to the specific climate of the region. The “foreigners” from Poland and Holland that have filled our garden centers are more expensive, but most importantly, they were grown in conditions that differ sharply in soil, climatic and environmental factors.
The final price of a hedge will be determined by its length, number of tiers and the cost of green “filling”. The same plant for sale can be seen in different formats, which are reflected in its price. The following parameters may differ:
- age of planting material,
- size,
- state of the root system - open or closed system.
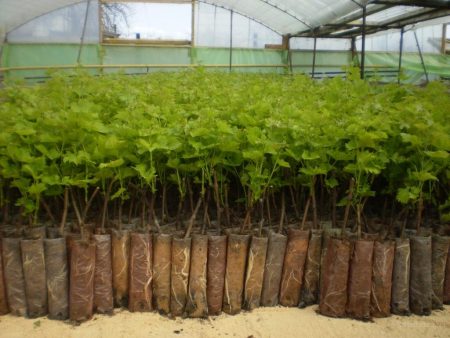
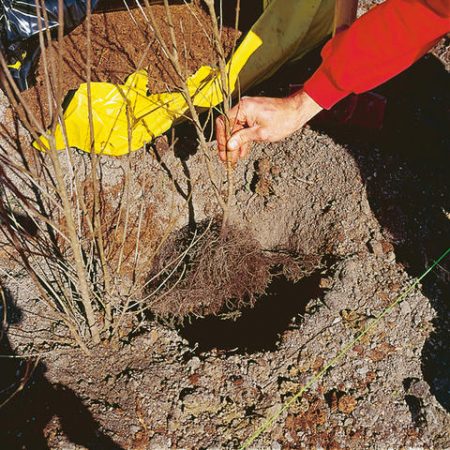
For group plantings (including hedges), some nurseries sell two- and three-year-old plants with open roots, without an earthen clod, several seedlings in a bunch. For successful survival, planting must be completed in the first half of May.
Trees and shrubs grown in pots or containers can be purchased and planted throughout the season.
Plants from which a living fence has been planted must be trimmed from the first year of planting.
Attention! You should not buy large specimens for molded hedges, which are more suitable for “solo” plantings or for free compositions.
This is especially true for deciduous trees. In the nursery, most often their crown is formed for free-standing trees, clearing the trunk of lateral branches. A fence of such oriented seedlings for another task will additionally require special stimulating pruning so that the “legs” of the fence do not end up bare.
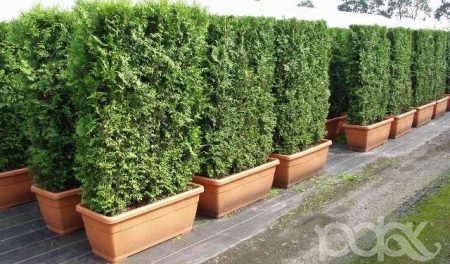
Today a new trend has emerged - the sale of ready-made hedges. They look like blocks in the shape of a parallelepiped from plants densely planted in a container, with a height of 60 cm to 2 m. The width of an individual block is up to 100 cm, the depth is from 30 to 60 cm.On the one hand, the process of creating a living fence from ready-made “segments” is greatly facilitated and accelerated, on the other hand, the final astronomical price of such a fence reduces the number of people willing to purchase it.
 Which plants are best used to make a hedge?
In the middle zone and north-west of Russia, the best relatively inexpensive material for growing hedges yourself are tree species that are easy to trim - conifers:
- thuja western and eastern,
- spruce (common, prickly, ayanskaya),
- juniper virginiana, common, cossack;
- deciduous:
- small-leaved linden,
- rough elm,
- field maple.
Borders used to frame paths, platforms and isolate individual areas of the garden are best made from quite affordable ornamental shrubs:
- brilliant cotoneaster,
- bladderwort viburnum,
- white snowberry,
- caragana bush,
- cinquefoil (“Kuril tea”),
- barberry,
- privet.

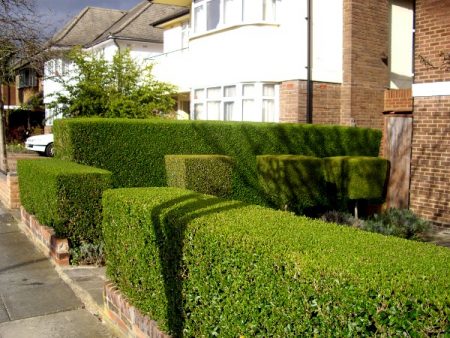
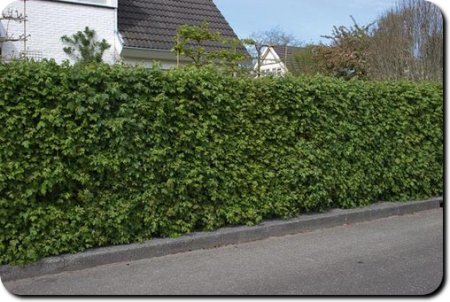
You can make a hedge yourself.
Making a hedge from scratch
In the Moscow region, the minimum cost of a deciduous seedling 0.5 m high with packed roots is 200 rubles, coniferous - 300. If you consider that the planting density is on average 2-5 plants per linear meter, then it becomes clear how much the desired plant will cost the owner hedge There is a way out - if you wish, you can make a hedge yourself.
The seed method of propagation takes a long time and does not always lead to the inheritance of the desired properties of the “source”. The most common method of propagating trees and shrubs in ornamental gardening is propagation by cuttings: green and lignified.
Propagation with green cuttings
Hydrangea, cinquefoil, juniper, clematis, honeysuckle, etc. are easily propagated by cuttings. Generally speaking, this is a rather cumbersome method of breeding perennials. The special microclimate regime necessary for the successful rooting of green cuttings can only be created in protected soil conditions - in a greenhouse or greenhouse. Reproduction by green cuttings requires maintaining certain conditions in such a “kindergarten”:
- high air humidity – 80-90%,
- constant ambient temperature - 25-30 degrees,
- light and moisture-absorbing substrate,
- shading the greenhouse from overheating by direct sunlight.
But if there is a desire to have a friendly “squad” of specimens of a plant you like, then difficulties will not stop a motivated summer resident.
The preparation of green cuttings itself is not difficult, but the cutting rules must be followed:
- The mother bush or tree should be mature, but not old.
- Cuttings are harvested in the second half of June, when the period of intensive shoot growth begins to decline. Such shoots are very flexible, do not break, and their stems are slightly lignified.
- Cuttings 6-10 cm long, with several buds on them, are cut from the middle part of strong shoots, after removing their upper immature herbaceous part.
- The lower leaves from the cuttings are cut off, the upper ones are shortened by half.
- The lower sections of the cuttings are treated with a growth stimulator (for example, heteroauxin), kept in its solution for 15-18 hours.
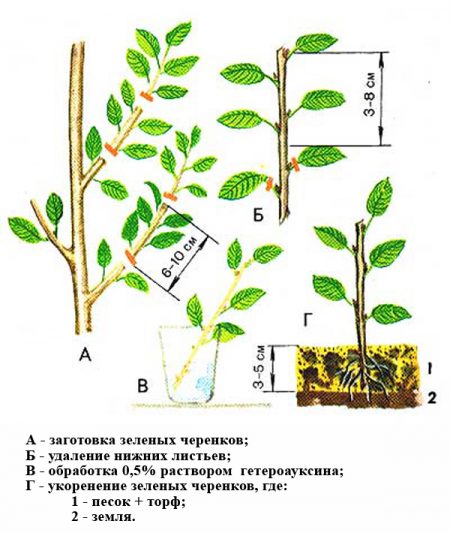
A mixture of peat and sand in proportions of 1:1 or 2:1 is suitable as a substrate for rooting cuttings. Planting pattern – 5 cm in a row x 10 cm between rows.
Seedling care includes:
- watering,
- feeding with microelements,
- spraying with water,
- systematic ventilation of the greenhouse,
- timely removal of rotten seedlings.
After 3-4 weeks of careful care, the pets begin to grow, fresh leaves appear on them - this indicates success and the beginning of rooting of the cuttings.
From this moment, the seedlings begin to harden and adapt to natural conditions. To do this, the shelter is periodically removed. A month before the end of the growing season, the greenhouse is completely removed, the plantings being mulched to prevent freezing. In the spring, a hedge is planted from overwintered seedlings.
Propagation by lignified cuttings
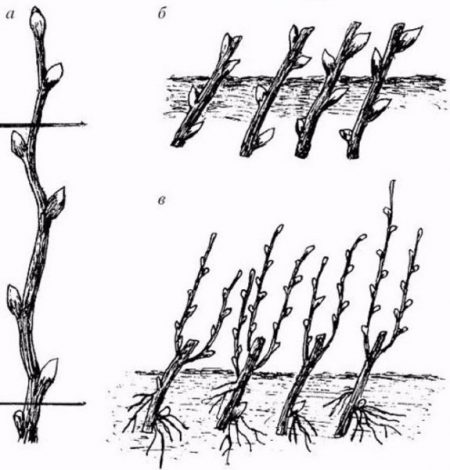
Some types of tree crops propagate better from lignified (“woody”) cuttings. This applies, for example, to barberry, currant (common and ornamental), and willow.
Such cuttings are harvested in December-January, or, in extreme cases, in late autumn before the onset of frost. From the middle parts of mature branches, the diameter of which is no more than 1 cm, secateurs are used to cut segments 15-20 cm long. They are tied into bundles, packaged to prevent drying in a “breathable” film and stored in a cellar or refrigerator at an air temperature of 1-3 degrees Celsius. When spring heat sets in, they are also treated with a growth stimulant and planted obliquely in a “school” under a transparent cover. The depth of embedding in the soil should be such that only one or two buds remain above the surface. Shoots will then appear from them, and roots will appear from those hidden in the ground. You can “build” a fence from the seedlings that have formed by autumn.
Some tips from the professionals:
- shoots for cuttings are chosen that are healthy, with vigorous growth, not blooming this year,
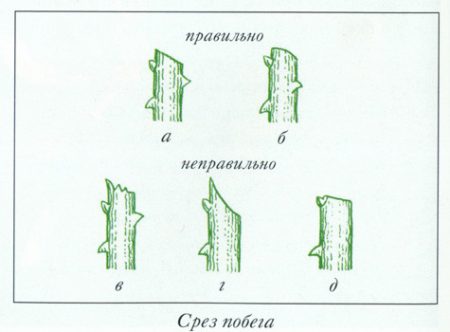
- the upper end of the cutting should end with a cut at an angle of 45 degrees (“life angle”) a centimeter above the outer bud, the lower end with an oblique cut under the lower bud,
- cuttings are harvested and planted with a good quantitative supply, taking into account the inevitable culling at different stages of growing seedlings.
Features of creating fences from coniferous trees
For conifers, the story is similar: propagation of coniferous plants from seeds guarantees the preservation of maternal properties only in wild crops. The forms obtained as a result of selection most often do not reproduce the characteristics of a given variety during seed propagation. But during vegetative propagation, including cuttings, the characteristic features of the mother plant are passed on to the “children.” In addition, the process of growing seedlings (for example, thuja) from seeds lasts up to 5-6 years, but by cuttings you can get a new plant in 2-3 years.
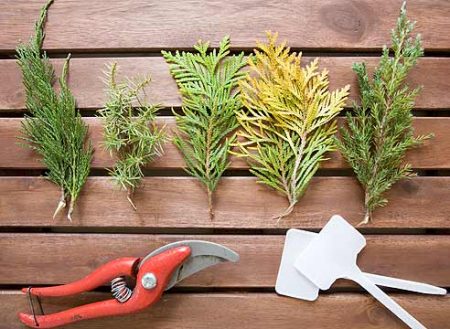
Breeding conifers has its own specifics; the success of rooting largely depends on the correct choice of cuttings:
- Cuttings taken from young varietal specimens take root more easily. Cuttings taken from a plant in a “wild” culture have a low percentage of root formation;
- thin and lateral shoots produce roots faster than strong and vertically directed ones;
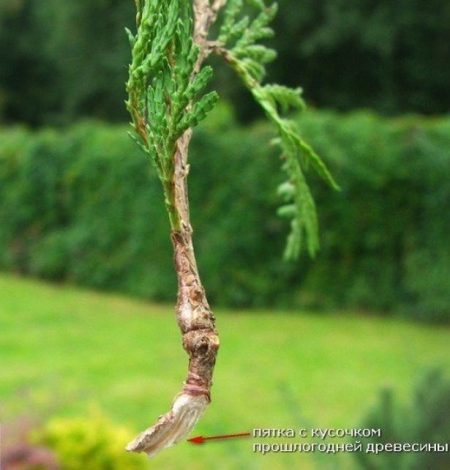
- Coniferous cuttings are not cut, but carefully separated from the main branch with a “heel” - a small piece of bark and mature wood;
- When planting, the back side of the branch should remain “looking” down.
Attention! Representatives of the Pine family root cuttings very poorly.
The best time to take cuttings is spring, at the beginning of the buds, and the first half of summer, after the growth of young shoots has subsided and they have hardened.
Coniferous seedlings are more finicky to care for and do not like changes in temperature and humidity:
- the temperature in the greenhouse and greenhouse should be lower than for deciduous plants - only 20-23 degrees, not higher than 25.It will be necessary to create diffuse lighting and constant shading from direct sun with lutrasil or paper;
- humidity - up to 100%, and the presence of water “dust” in the air is desirable, which can only be created by a fog-forming installation;
- there must be drainage under the substrate layer, since waterlogging of the soil threatens a lack of oxygen for the roots and, as a consequence, the death of the seedlings.
Rooted seedlings of frost-resistant conifers can overwinter without shelter. But it is best to install “houses” over them from boxes with a roof made of spruce branches. If the cuttings were planted in a greenhouse not in the ground, but in boxes, then in the fall the cuttings are taken out of the greenhouse, dug into the ground until spring and covered in the same way.
Hedge planting dates
The end of April - the first half of May is the best time for planting all types of plants. During this period, they best take root and restore the root system, which is inevitably damaged during digging. During the mass leaf fall (September - early October), the time for autumn planting begins.
Attention! Later planting dates for coniferous crops often lead to their death. The plant continues to evaporate moisture through the needles, and the process of active formation of new roots is skipped. The seedling has nothing to get the required amount of water from the soil, and it dries out.
Plants with a closed root system grown in container culture can be planted throughout the growing season. You need to be prepared for the fact that such planting material is much more expensive. A fence consisting of such elements will look more representative than one made of nondescript seedlings with bare roots. But in two years they will level out in terms of presentability.
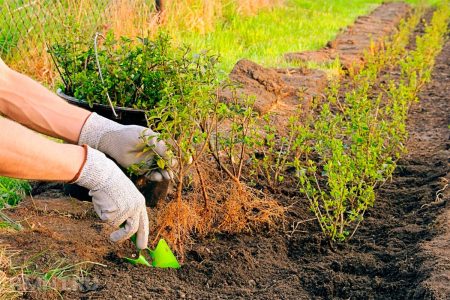
Hedge planting technique
If you decide to make a hedge yourself, then you need to familiarize yourself with the technology of planting such a “living” fence.
A hedge is a line of impenetrable plantings, a single whole. Therefore, a single landing site is prepared. The area must be dug up in advance and freed from construction debris and weed roots.
From the edge of the garden path to the trunk of the tree, which is an element of the fence, there should be at least 70 cm, and to the central zone of a medium-sized bush - 50 cm. If the plant strip is intended to camouflage an unattractive wall of the fence, then the distance between the living and non-living fence is maintained about 1 m .
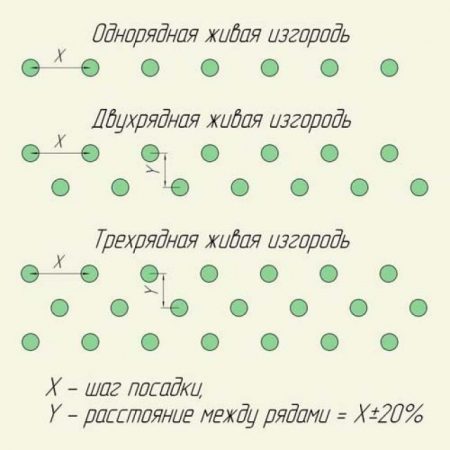
They dig a trench 50-60 cm deep and 40-50 cm wide. If the plants are planted in two rows, the width of the two-line fence should be 70-90 cm. If a three-tier wall is planned, then add another 30-40 cm in width to the third row.
Attention! When planting a multi-row hedge, the plants of each next row are planted in a checkerboard pattern relative to the previous one.
When digging a trench, the upper, more fertile layer is thrown to one side, the lower one to the other, and is used to level the row spacing.
Planting of seedlings proceeds according to the following “scenario”:
- Peat, compost or humus is added to the top layer of the removed soil, mixed with superphosphate for active root growth after planting, and the ditch is filled with this substrate. If the soil at the planting site is heavy and clayey, it is recommended to first pour sand, gravel or expanded clay into a layer of up to 10 cm at the bottom of the trench.
- Then pegs are placed in the center of the trench and the cord is pulled for single-row planting and two for double-row planting.In the latter case, the stakes of the other row are installed from each other at a distance equal to the row spacing.
- In a trench along these landmarks, planting holes are dug with a diameter exceeding the diameter of the root system of the seedling. The distance between them depends on the type of plant - from 2 to 5 copies per linear meter. When planting a dense fence of trees in one row, the distance between them should be no more than 1 m, otherwise the fence will look like an alley.
- Place the seedling in the center of the hole, distribute the roots evenly and cover it with the prepared substrate. In this case, its root collar should be slightly above the soil level, since the earth will then settle. The earth around is carefully compacted.
- A roller is made along the edges of the trench so that when watering such a furrow, water does not spread over the surface of the soil. Water generously even in rainy weather, preferably with a solution of root stimulants.
- The resulting gullies and voids are filled with the remaining soil, and the leaning seedlings are leveled.
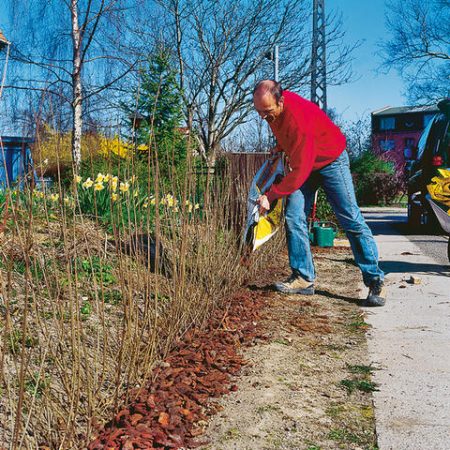
- The tree trunk strip is mulched with peat to maintain optimal water and temperature conditions in the root zone. An effective solution would be to use wood chips, pine bark, and buckwheat husks as mulch.
Hedge care
Caring for a hedge has specific features based on the special conditions of the existence of flora representatives in it. Plants here feel in much more cramped conditions, where their brothers and sisters are “in the wild.” This is facilitated by:
- the inevitable struggle of closely located competitors for nutrients and moisture in the soil;
- the situation is aggravated if the line is planted along a fence with its foundation or a path with a thick cushion.Over time, the trench becomes overfilled with roots, and they begin to die, which is quickly reflected on the exterior of the fence.
Therefore, from the second year of planting, it is necessary to strictly adhere to the schedule of regular fertilizing with organic and mineral substances:
- in the spring, at the beginning of bud break (along the “green contour”) – with nitrogen,
- in July-August, during intensive root formation - phosphorus and potassium,
- Do not forget about adding humus and compost to the soil.
The plants are also fed after each cutting.
In addition to traditional methods, foliar feeding and assistance to young plantings in the form of growth stimulants (for example, heteroauxin) are indicated.
When watering, it is important to thoroughly saturate the root layer with water. If there is no mulch, loosen the soil under the fence no deeper than 5 cm.
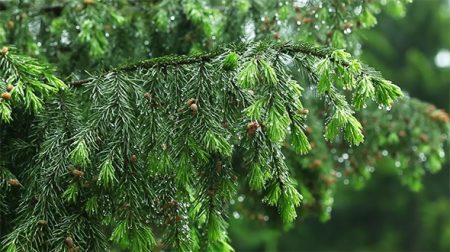
The hedge responds well to sprinkling - watering with a stream of pressure from a hose. Coniferous plants especially “love” this procedure, since accumulated dust is washed off from needles that live from 3 to 5 years.
Every year they carry out sanitary pruning, removing weak and diseased shoots. A haircut that forms the contours of the hedge is done 2-4 times during the growing season, depending on the growth rate of the shoots.
If the difficulties of creating “from scratch” do not frighten a keen gardener, then a hedge made with his own hands will rightfully serve as a source of pride for many years.

 (6 ratings, average: 4,67 out of 5)
 CUCUMBERS NEVER GET SICK, I'VE BEEN USING ONLY THIS FOR 40 YEARS! I SHARE A SECRET WITH YOU, CUCUMBERS ARE LIKE THE PICTURE!
 You can dig a bucket of potatoes from each bush. Do you think these are fairy tales? Watch the video
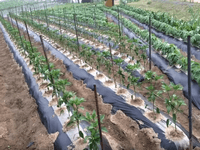 How our fellow gardeners work in Korea. There is a lot to learn and just fun to watch.
 Eye trainer. The author claims that with daily viewing, vision is restored. They don't charge money for views.
 A 3-ingredient cake recipe in 30 minutes is better than Napoleon. Simple and very tasty.
 Therapeutic exercises for cervical osteochondrosis. A complete set of exercises.
 Which indoor plants match your zodiac sign?
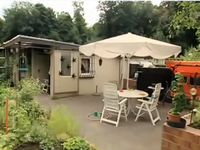 What about them? Excursion to German dachas.