Planting spring (summer) garlic is, at first glance, a simple matter. But to get a good harvest, you need to properly prepare the seeds and know the peculiarities of the agricultural technology of the crop.
Distinctive features of spring garlic
Spring and winter garlic differ from each other in a number of significant parameters.
- The yield of spring garlic is less than that of winter garlic.
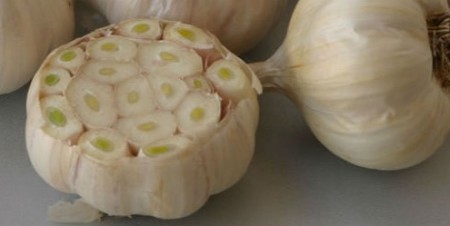
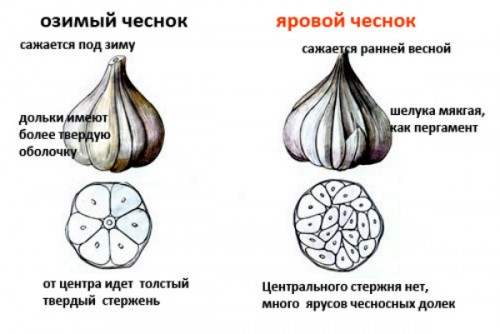
- There is no central core in spring varieties.The cloves are arranged spirally; there can be up to 20 of them in the head. In winter varieties, the head contains 5-7 cloves located around the main axis.
- Summer garlic contains cloves of different sizes: on the periphery they are large, and the closer to the center, the smaller they are. In winter varieties, the segments are aligned and of the same size.
- Spring varieties do not bolt (except for the Gulliver variety), while winter varieties are both bolting and non-bolting.
- Winter garlic has wide leaves, while spring garlic has narrow leaves.
- Spring garlic is stored until the new harvest. Winter crops are unsuitable for long-term storage; they must be used before January.
If there is free space on the plot, you can plant both types of garlic.
Vernalization, sorting, disinfection and treatment of seeds before planting
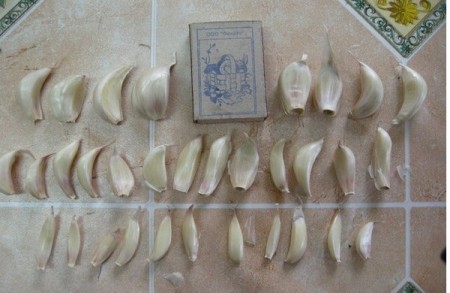
Spring garlic is grown only from cloves. Seed material is prepared for planting in 1.5-2 months. Preparation includes:
- vernalization;
- sorting;
- disinfection and etching.
Vernalization - this is the effect of low positive temperatures (2-6°C) on seeds to accelerate their germination. It is carried out only for spring garlic. The duration of vernalization is 40-50 days. Boxes with heads are taken out on warm days in the last snow and left in the air for 5-6 hours. If it is not possible to take the garlic outside, then it is placed in the refrigerator and kept at a temperature of 2-6°C for 1.5-2 months. Vernalization allows you to shorten the growing season by 8-10 days.
Sorting. The largest heads are selected, split into slices and carefully examined. They must be smooth, the same color, elastic, without damage, stains, or mold.A change in the color of the outer scales of individual cloves at the base to a yellow tint indicates infection of the head with a stem nematode.
Gray spots and mold are an indicator of the presence of spores of fungal diseases. If the slices become soft, then this is a sign of loss of germination, and such seeds will not germinate. If at least one clove is damaged, then the entire onion is discarded.
Before planting garlic, carry out disinfection and dressing of planting material. When seeds are infected with a stem nematode (as indicated by a change in the color of the cloves), they are immersed for 10-15 minutes in water heated to 45°C. You can place the slices for 3-5 minutes in water at a temperature of 55-57°C. This is an effective way to disinfect seeds without affecting their germination.
Etching Before planting, it allows you to destroy disease spores in the seed material. Prepare a fungicide solution according to the instructions and soak the cloves in it for 1 hour.
The most commonly used insectofungicides are Prestige, contact fungicides Maxim, Tiram, and bacterial fungicides Fitosporin and Gamair. After etching, the planting material is thoroughly dried and planted. The period of protective action of fungicides is 1.5-2.5 months.
There are few varieties of spring garlic; they can be grown in all climatic zones of our country. The most common varieties are Victorio, Gulliver, Ershovsky, Samorodok, Uralets.
Fertilizer application
Garlic produces excellent quality bulbs in fertile soils. To increase soil fertility, add humus, compost, and leaf soil (2 buckets/1 m²). Manure, even completely rotted, cannot be applied, since it contains a large amount of nitrogen.Spring varieties (unlike winter varieties) with this fertilizer grow into leaves and do not set heads. For the same reasons, nitrogen is not added.
Potassium fertilizers must be applied to the crop. The best of them is ash; 0.5 buckets per 1 m² are added during planting. If it is not there, then use potassium sulfate (30 g/m²).
Site preparation
Waterlogged, heavy loamy and acidic soils are not suitable for planting spring garlic. In waterlogged soil, plants become wet. If water is constantly retained on the site, then the crop is grown in ridges or high ridges with a slope. A slope of 1° is enough so that the water does not stagnate, but at the same time does not erode the soil.
On heavy loams, the soil is very dense and weak garlic roots cannot penetrate through the dense particles of soil. The plants do not produce a good harvest. To reduce the density of the soil, sanding is carried out: add 2-3 buckets of sand per 1 m² and dig up the soil to a depth of 18-20 cm.
Garlic grows poorly in acidic soils and small heads are formed. The fact that the soil is acidic is indicated by the abundance of plants such as plantain, sorrel, horsetail, and wood lice. Acidity can be determined independently using special instruments or indicator strips. To reduce soil pH, liming is carried out.
Different types of lime fertilizers work differently. The effect of adding fluff appears immediately and lasts only a year. Limestone flour deoxidizes the soil for 2-3 years, but its effect begins in the second year after application. The effect of dolomite flour appears after 3 years and lasts up to 5 years.
Application rates of limestone flour (kg/10 m²) at different acidity values (pH)
|
Soil composition |
Soil pH |
||||
|
4.5 and less |
4,8 | 5,2 | 5,4 — 5,8 | 6,1 — 6,3 | |
| Sandy loam and light loamy |
4 kg. |
3 kg |
2 kg |
2 kg |
— |
| Medium and heavy loamy |
6 kg. |
5 kg |
4 kg |
3.5 kg |
3 kg |
Dolomite flour is equated to limestone, and fluff is added at a rate of 1.35 times reduced compared to limestone.
The area for planting garlic is prepared in the fall. The soil is dug up to a depth of 18-20 cm and all necessary fertilizers are added. The ridges are made in a well-lit place, protected from cold winds.
Planting spring garlic
The growing season of spring garlic is 30-35 days longer than that of winter garlic. Therefore, it is planted early in the spring, as soon as the snow melts and the ground warms up to 6-7°C. Typically, spring garlic is planted from mid-April to early May. The exact timing depends on the weather and region. If planting is delayed, the heads may not ripen.
It is strictly forbidden to plant spring garlic after onions and garlic (including winter garlic), since they have common pests and diseases.
Garlic is planted in rows, the distance between the cloves in the rows is 7-9 cm, the row spacing is 12-15 cm. If the cloves are very large, then the distance between them is increased to 12 cm. The seeds are planted to a depth of 1.5 times the length of the clove (3- 4 cm).
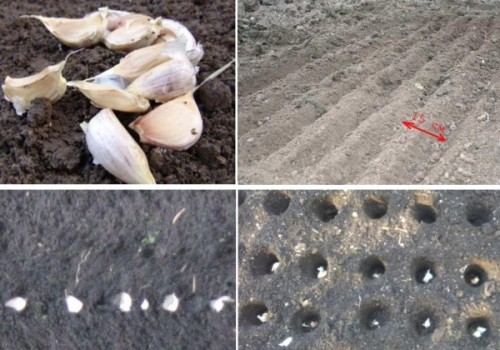
With deep planting, the growing season increases by a week. If the soil is very dense, then do not press the slices into the ground, otherwise the roots will carry them to the surface. The rows are covered with earth and leveled. There is no need to water the soil, since in spring it contains a sufficient amount of moisture.
If the night temperature drops below -4°C, then the ridges are covered with straw, since unrooted cloves may freeze. Garlic seedlings are not affected by frost.
Garlic planted in compliance with all the rules of agricultural technology requires minimal care in the future.
You may be interested in reading other articles about growing garlic:
- Planting and caring for winter garlic.
- How to feed garlic
- Characteristics of varieties of winter and spring garlic.
- Why do garlic leaves turn yellow?
- Storing garlic in winter
- How to get large heads of garlic

 (5 ratings, average: 4,20 out of 5)
 CUCUMBERS NEVER GET SICK, I'VE BEEN USING ONLY THIS FOR 40 YEARS! I SHARE A SECRET WITH YOU, CUCUMBERS ARE LIKE THE PICTURE!
 You can dig a bucket of potatoes from each bush. Do you think these are fairy tales? Watch the video
 How our fellow gardeners work in Korea. There is a lot to learn and just fun to watch.
 Eye trainer. The author claims that with daily viewing, vision is restored. They don't charge money for views.
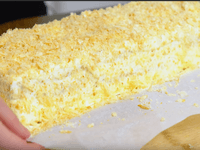 A 3-ingredient cake recipe in 30 minutes is better than Napoleon. Simple and very tasty.
 Therapeutic exercises for cervical osteochondrosis. A complete set of exercises.
 Which indoor plants match your zodiac sign?
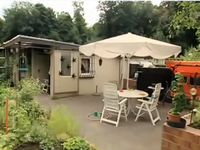 What about them? Excursion to German dachas.