To increase and diversify the number of clematis varieties in your garden, you need to learn how to propagate this plant. Propagation of clematis is possible in several ways, and some of them are so simple that the most inexperienced amateur gardener can master them. 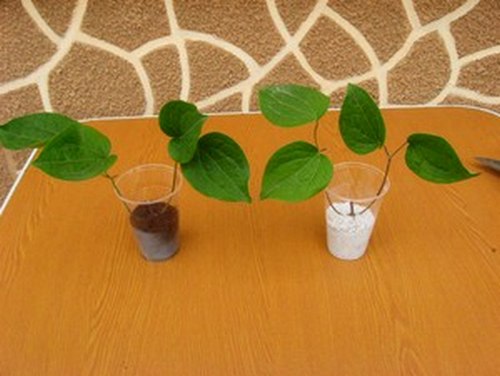
The main methods of propagating clematis are:
- Propagation of clematis by cuttings.
- Reproduction by layering.
- Dividing the bush.
- Seed propagation.
To breed large-flowered, varietal clematis at home, only vegetative propagation is used.
Clematis cuttings
Propagation of clematis by cuttings is one of the most famous and popular methods of propagating this plant.
When to start cutting clematis. The best time for cuttings is the end of May, the beginning of June. This is the time of budding of plants.
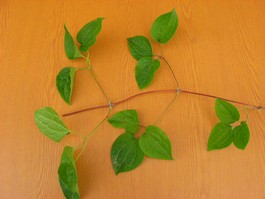
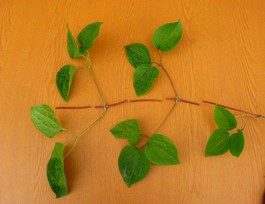
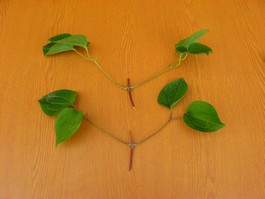
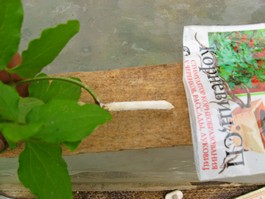
How to prepare cuttings. Cuttings are cut from the middle part of the shoot. The upper, unripe part of the shoot and the nodes with buds are not suitable for this purpose. It is better to cut cuttings with one internode and two well-developed buds in the leaf axils. Leave a stem 3 - 4 cm long under the node, and 1 - 2 cm long above the node. The photo below clearly shows how this is all done.
 We are preparing to escape. |
 Let's cut it. |
 We get such cuttings. |
 Don't forget to dip the cuttings in root. |
Soil for rooting. The main requirement for the soil: it must be breathable, light and at the same time moisture-absorbing. The soil should not dry out quickly and should have good air permeability, which is necessary for the cuttings to form roots.
You can use the following mixture: two parts plant humus and one part sand. Or something like that. Cuttings root well in vermiculite, perlite, and coconut fiber. But in this case, after the roots appear, the cuttings will still have to be transplanted into nutrient soil.
How to root clematis cuttings.
- It is convenient to root the cuttings in plastic cups, then it will be clearly visible when the roots appear. In this case, make drainage holes, fill a glass with soil or perlite, spill it generously and stick the cutting into it.Before this, the lower part of the cutting should be dipped in the root, and only then stuck into a glass so that the internode is half in the ground. You can't completely fall asleep.
- Cuttings also take root well in the ground. To do this, you need to dig a small hole, fill it with breathable, nutritious soil, and top it with a 3-4 cm layer of sand. You can do it a little differently. Instead of a layer of sand, use a stick or finger to make depressions in the soil, fill them with sand or perlite and go there

Cuttings in a greenhouse.
stick the cuttings.
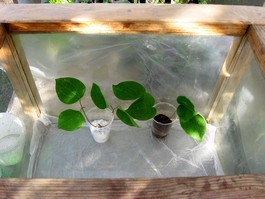
In both cases, a film greenhouse must be built over the cuttings. Cuttings need a moist environment; they must be sprayed with water 2-3 times a day and once every 5-7 days with a zircon solution. Watering with sodium humate also gives good results; it is enough to do this once every 2 weeks.
Temperature for rooting. I would like to especially emphasize this point.
Firstly, this is a much more important factor than many might think.
Secondly, ensuring the optimal temperature for root formation in summer can be very difficult, and sometimes simply impossible.
Propagation of clematis by cuttings should take place at a temperature not exceeding 30 degrees.
The optimal temperature is about + 25, but if it is + 30 outside, then under the film, even in the shade it will be below 40, and this is a very serious test for the cuttings. In hot weather, cuttings sitting in the ground have a better chance of survival. And of course, greenhouses should be located in the shade, under trees.
On average, cuttings take about a month and a half to take root. Then the greenhouses must begin to be ventilated, and after about a month the film is removed.
Clematis cuttings video
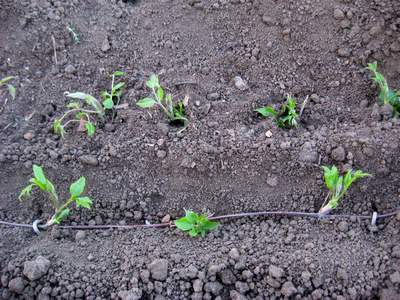
Rooting clematis cuttings in bottles
Clematis can also be propagated in bottles. This greatly simplifies the whole process. Actually, at first everything is done as described above. Only instead of a glass, the stalk is placed in a plastic bottle, after which the top of the bottle is put in place and wrapped with tape.
 Place the cutting in the bottle. |
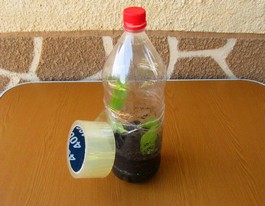 We make a mini greenhouse out of a bottle. |
The cutting immediately ends up in a mini-greenhouse. These bottles must be buried in the ground, to level
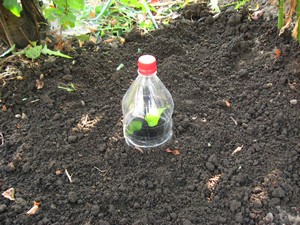
We bury the bottle with the cutting in the garden, in the shade.
soil poured into them. This way they will overheat less. It should be buried in the shade, but you shouldn’t shade it too much either; light is needed for root formation. After two weeks, you need to start ventilating the bottles (unscrew the cap for about 20 minutes), and when shoots appear, remove the caps completely and make drainage holes.
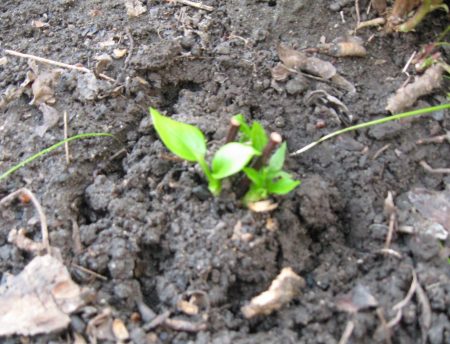
And now young shoots have appeared.
It is better to put young plants in the cellar for the winter, but if they are well insulated, they can overwinter in the garden.
Reproduction of clematis by layering
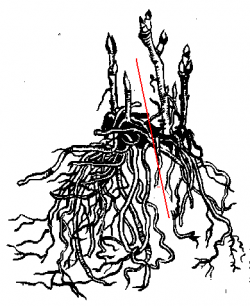
It is this method of propagating clematis that can be considered the simplest and at the same time very reliable. Its essence is as follows: the clematis shoot is completely buried in the ground and during the summer a young bush grows from each internode.
It is most convenient to do this in early spring. When, after wintering, you lift and tie clematis to supports, choose a good shoot that has not been broken during the winter. Place it in the prepared groove (groove depth 7 - 8 cm). The shoot will bend and puff up, so it will have to be pressed to the ground with some kind of hooks.
Such shoots can be buried.
If you are breeding clematis and you need a lot of seedlings, then dig in not one, but 2 or 5 shoots, but don’t bury their ends; they should look out of the ground at least 20 cm. You shouldn’t fall asleep right away either. Let them lie in the furrows until the young shoots grow 10 - 15 cm. Then cover them with humus or soft earth.
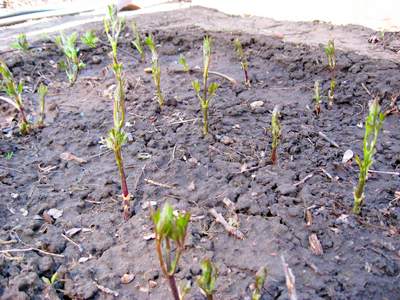
And these shoots already need to be pinched.
In the future, pinch the shoots and mulch everything around. Of course, the ground here should be moist throughout the summer. That's all. All that remains is to wait until next spring and plant the cuttings. It is better not to do this in the fall; let them overwinter in conjunction with the mother plant, and cover them with leaves or pine needles for the winter. As you can see, propagation of clematis in this way is available to everyone.
I must warn you that these young bushes must be dug up very carefully. Otherwise, half of them will end up without roots. The point is this: all these bushes are connected to each other by a shoot. They are, as it were, strung on this escape. And when you begin to lift one bush with a shovel, it will pull the neighboring one along with it and the root of the neighboring one will break off. It will be very disappointing.
The photo shows that one layer has a root, but the neighboring one does not. And he was, but remained in the ground.
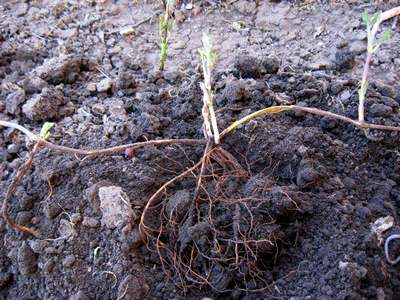
One of the cuttings lost its root
Therefore, first you need to find these shoots in the ground and cut them. And after that, start digging up cuttings and planting them in a permanent place.
You can familiarize yourself with the rules for planting seedlings in the article about planting clematis in spring And autumn planting.
We propagate clematis by dividing the bush
Reproduction of clematis by dividing the bush.
This method of reproduction is also quite simple, but somewhat more labor-intensive than the previous one. If a relatively young bush is to be divided (up to 5-6 years), then it is simply dug out of the ground and divided into parts with a knife, sector, and sometimes an ax. Each of these parts should have a bunch of roots and 1 - 2 shoots.
Old clematis are dealt with differently. The old bushes have just huge roots! Therefore, they are not dug up, but undermined on one side, trying to dig a deeper hole. Use a stream of water from a hose to wash the exposed root (this will make it easier to see where to cut the roots). After this, a part of the rhizome is cut out with a shovel, removed and further divided into several sections. When planting in a new place, the shoots of all divisions are pruned to two buds.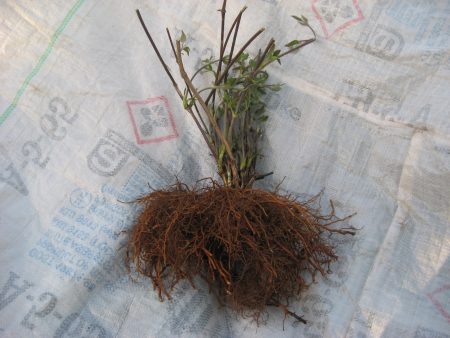
We dig up the bush, trying to preserve as many roots as possible. We wash the root so that it is clearly visible where it is best to divide it.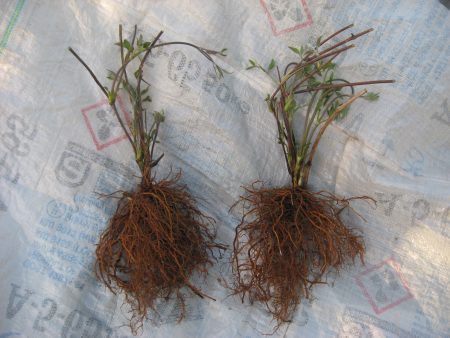
We divide the rhizome into 2-3 or 4 parts and plant them in new places
Propagation of clematis by seeds
Only small-flowered, wild-growing species of clematis are propagated by seeds. Before planting, such seeds must be stratified. To do this, they are first soaked for several days. Then they are covered with wet sand and kept in the refrigerator for about two months. You can sow such seeds at the end of April, directly into the ground.
It’s even easier to sow clematis seeds in the garden in the fall. In winter, they will undergo natural stratification in the soil and germinate in the spring, as is usually the case in nature. Some gardeners, not wanting to take risks, sow seeds in the fall not in the ground, but in some kind of box. This box is buried in the ground before winter, taken out in the spring and, after waiting for the shoots to sprout, they are planted in the beds.
Such clematis often reproduce by self-sowing. Moreover, they reproduce so actively that they soon become weeds. This primarily applies to Tankut clematis.
Using clematis in the garden video.
We have other interesting articles on plant propagation:
- Propagation of roses by cuttings, the easiest ways.
- We learn to propagate honeysuckle by cuttings.
- Propagation of chrysanthemums by cuttings (methods giving 100% results)
- The easiest ways to propagate remontant raspberries.

 (22 ratings, average: 4,18 out of 5)
 CUCUMBERS NEVER GET SICK, I'VE BEEN USING ONLY THIS FOR 40 YEARS! I SHARE A SECRET WITH YOU, CUCUMBERS ARE LIKE THE PICTURE!
 You can dig a bucket of potatoes from each bush. Do you think these are fairy tales? Watch the video
 How our fellow gardeners work in Korea. There is a lot to learn and just fun to watch.
 Eye trainer. The author claims that with daily viewing, vision is restored. They don't charge money for views.
 A 3-ingredient cake recipe in 30 minutes is better than Napoleon. Simple and very tasty.
 Therapeutic exercises for cervical osteochondrosis. A complete set of exercises.
 Which indoor plants match your zodiac sign?
 What about them? Excursion to German dachas.
Thank you very much. Very good and detailed article.
Olga, I’m very glad that the article was useful to you.
Clear and understandable. I will try. Thank you for the detailed explanations!
Anna, good luck to you! I am sure that everything will work out for you.
thank you for your comment about clematis s.uv.tonya.
They gave me three branches of climatis, 30 cm long. They look dry, but they have small green buds. What should I do with them? Plant them at home in CUPS (divided into sections). Or plant it outside, buried in the grooves. Thanks a lot.
Anna, clematis shoots always look dry, but if the buds are green, then everything is fine. Since you have several cuttings, it is better to plant them both at home and in the garden (if the weather permits, of course). Just cover them and be patient, clematis cuttings take a long time to take root. It may take 2-3 months for them to take root.
Sorry, it’s not entirely clear what to do with clematis of the third pruning group? In mid-May they are just starting to emerge. What's there to dig up cuttings?
Natalya, if the shoots were cut off for the winter, then you just need to wait until the young shoots grow enough. They grow very quickly. In June - July they can already be cut or buried. But the buried, young shoots of clematis take root much worse than the old ones from last year. They most likely will not take root in one season, especially if the bush is young.
Interesting article, but I’m wondering if cuttings cut in autumn can be rooted after winter at home. I took the cuttings out of the cellar at the end of February, and the buds had already bloomed on them. Now plant them in the ground as seedlings for rooting?
Love, unfortunately I don’t have such experience, but it’s definitely worth a try. Plant as usual when cuttings are planted for rooting: stick them into breathable soil and cover the top with film or a cut bottle.
Hello! Please help me with advice! Last year I planted new varieties of clematis - they all took root well. I was cleaning the area and one bush (and buds had already come to life on it and even buds had formed) I accidentally tore to the very root. It’s a pity, there are no words.. While I stuck the whole bush into Epin’s solution. I don’t know what to do with it next... Will it take root if it is buried entirely in the ground? Or will I propagate through cuttings at the same time?)) And should I expect that the root will produce some shoots?
Svetlana, don’t worry, shoots will definitely come from the root. Digging in a whole shoot won't do anything.You can only cut cuttings with 1 - 2 internodes and try to root them, but this is only if you have the opportunity to spray them 4 - 5 times a day.